The Salesforce Developer Experience (DX) is a set of tools that streamlines the entire development life cycle. It improves team development and collaboration, facilitates automated testing and continuous integration, and makes the release cycle more efficient and agile.
This Salesforce DX quick start begins with source code living in your version control system (VCS). It doesn’t matter which VCS you use, only that you use one.
Declarative Change Set Development / Org-Based Model
- Here, ‘Production Org’ is the source of truth.
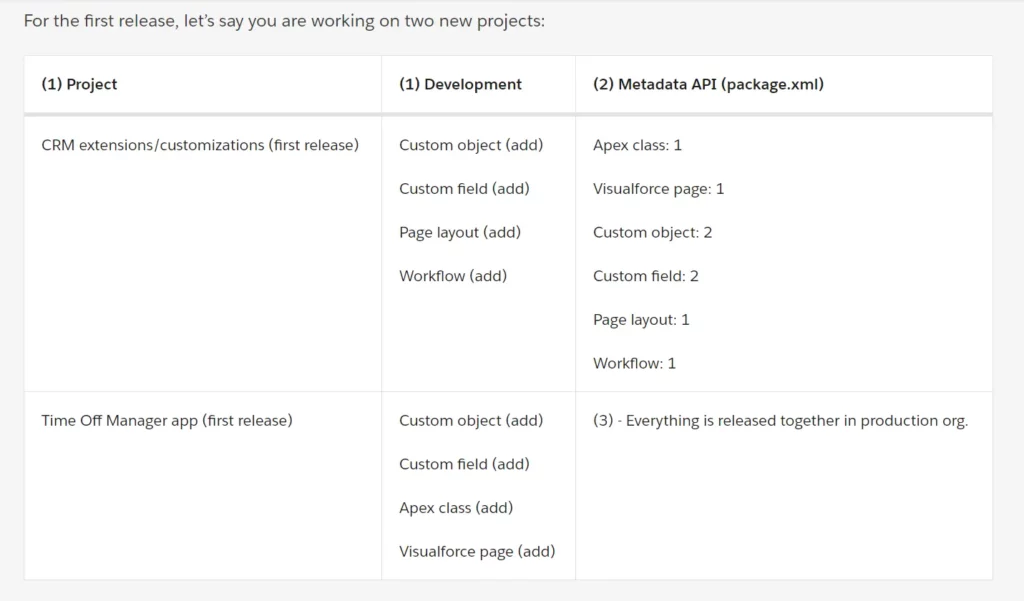
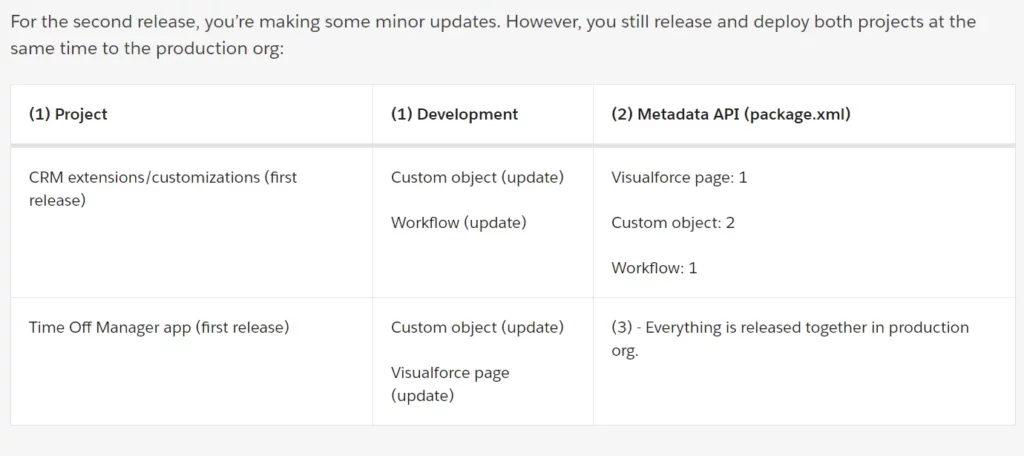
- Look the Diagram again, final deployment is not scoped to the Time Off Manager App or just the Crm extensions; it includes all changes to the org
Disadvantages:
- Your changes intermingle with what others have changed, so this process can be a tricky and somewhat manual.
Package Development Model / Version Control Bases Model
- Instead of building code and customizations for the org, we create a package (a logical set of code).
- VCS (Version Control System) is the heart of source-driven development. We need a VCS to manage and version of our source. We store all source for our packages in a source control repository, where the source of truth is maintained.
- Use Scratch Org, it is your own personal development environment. But it is temporary org.
Benefits of this model

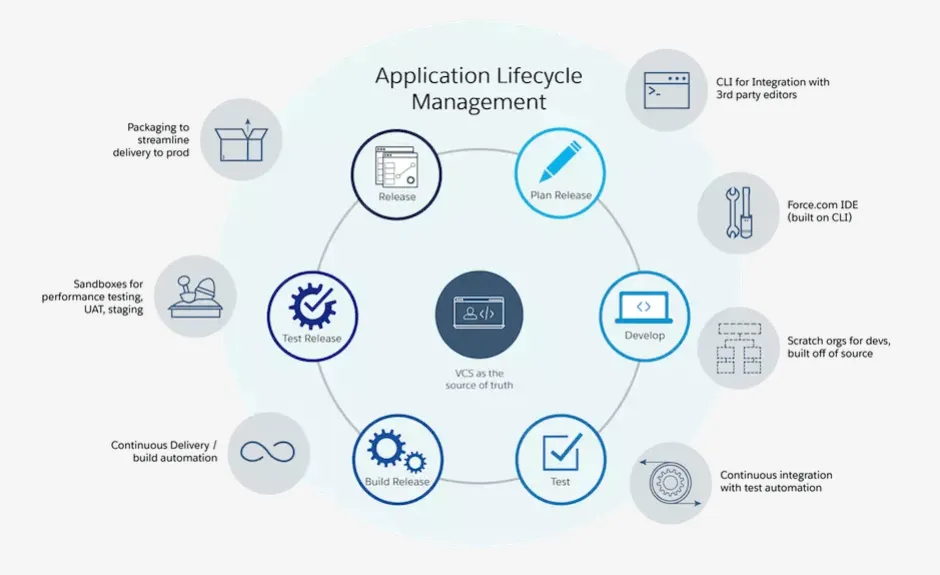
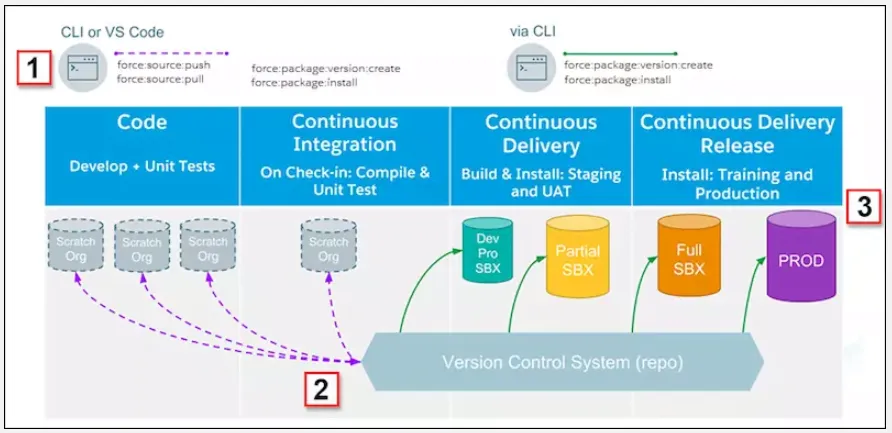
- When you’re ready to perform manual testing of your development work, push your metadata into a separate scratch org designated for that purpose.
- When you’re ready for release testing or continuous delivery automation, you create a package version.
- Instead of using change sets to move changes between environments, you create and install package versions in each testing environment.
- Metadata API ‘mdapi:convert’ and ‘mdapi:deploy’ commands continue to handle build and deploy use cases.
Set Up Your Salesforce DX Environment
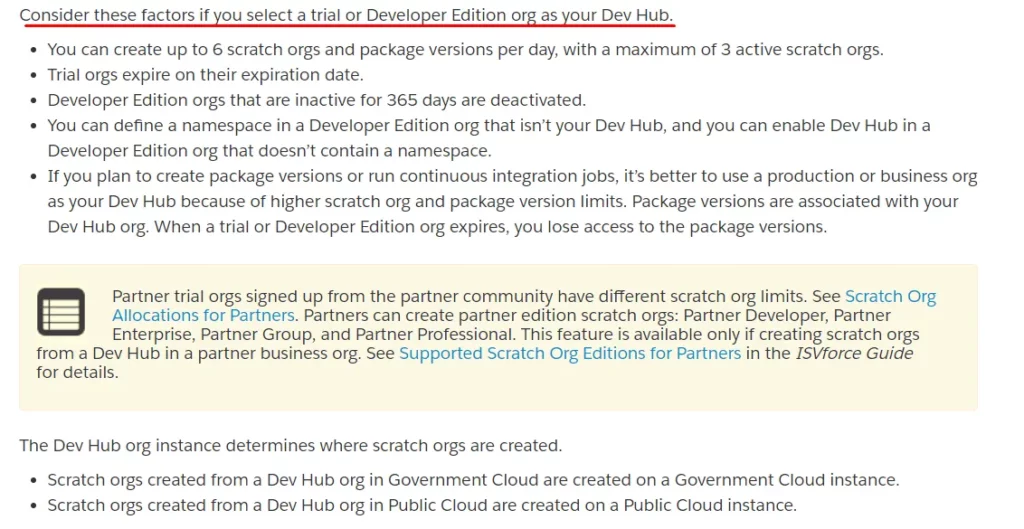
Enable Dev Hub in Your Trailhead Playground
- From Setup, enter Dev Hub in the Quick Find Box and select Dev Hub. Click Enable.
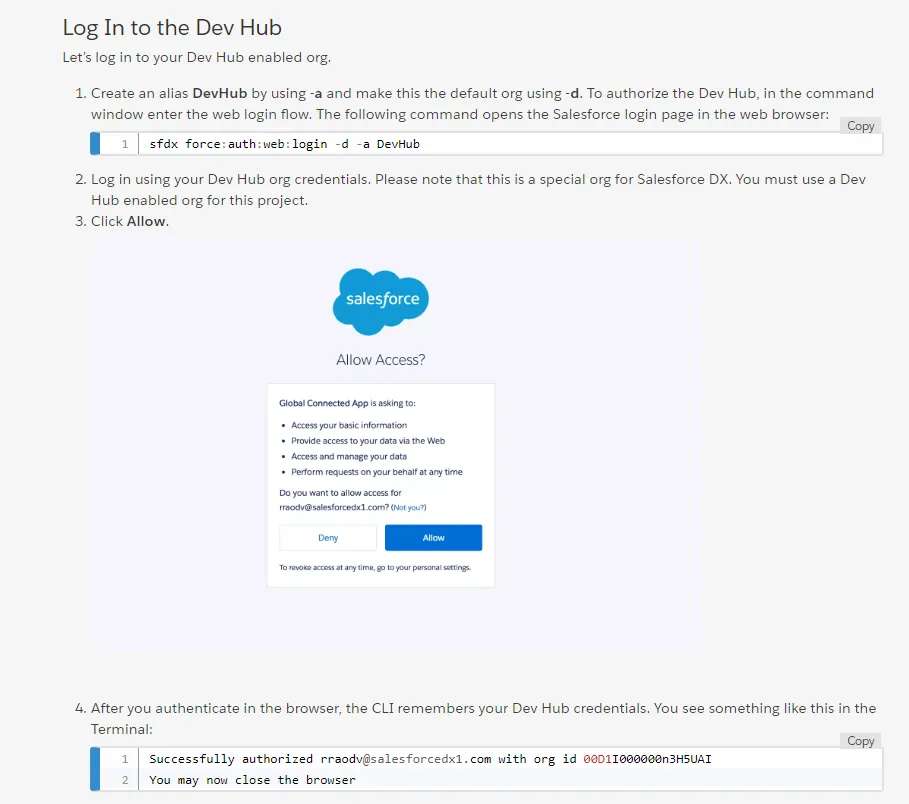
Log In to the Dev Hub
- Sfdx force:auth:web:login -d -a DevHub
- -a = alias
- -d = default
Download a Project from GitHub
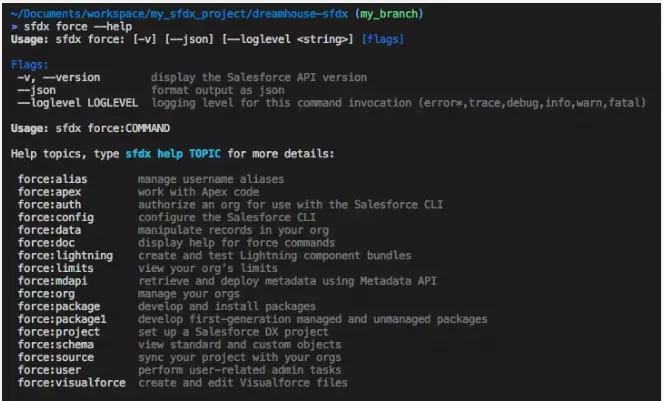
Create a Branch for Your Project
- git checkout -b my_branch ( Create a new branch).
- sfdx force –help
Create a Scratch Org
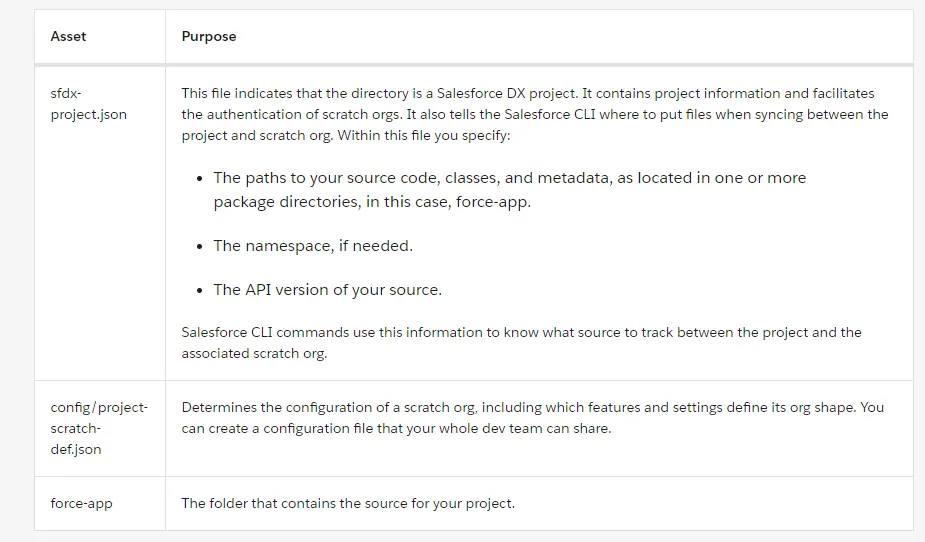
- sfdx force:org:create -s -f config/project-scratch-def.json -a dreamhouse-org
- -s = ‘set the created org as the default username’
- -a = ‘setalias’

Create Password

- sfdx force:user:password:generate -u TempUnmanaged6
- sfdx force:org:display -u TempUnmanaged6

- sfdx force:org:open
Push Source Metadata to Scratch Org
- sfdx force:source:push
Assign a Permission Set to the DreamHouse App and Import Test Data
- sfdx force:user:permset:assign -n Dreamhouse
- -n = ‘Permission Set Name’
Import Data
- sfdx force:data:tree:import –plan data/sample-data-plan.json
- –sobjecttreefiles
Export Data
- sfdx force:data:tree:export -q “SELECT Name, Location__Latitude__s, Location__Longitude__s FROM Account WHERE Location__Latitude__s != NULL AND Location__Longitude__s != NULL” -d ./data
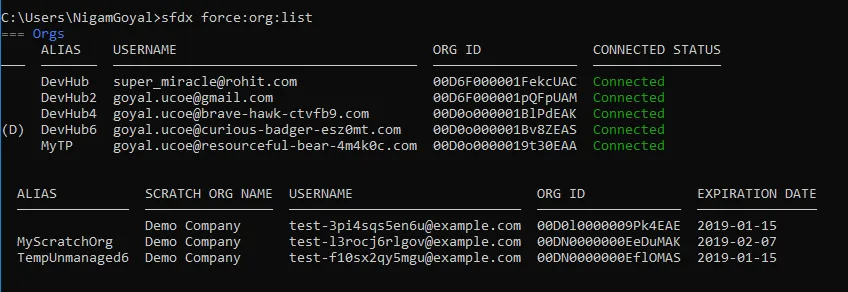
Org List
- sfdx force:org:list
- –verbose == provide you more info
Create Apex Class
- sfdx force:apex:class:create -n AccountController -d force-app/main/default/classes
Create Lightning Component
- sfdx force:lightning:component:create -n AccountLocator -d force-app/main/default/aura
Create Lightning Event
- sfdx force:lightning:event:create -n AccountsLoaded -d force-app/main/default/aura
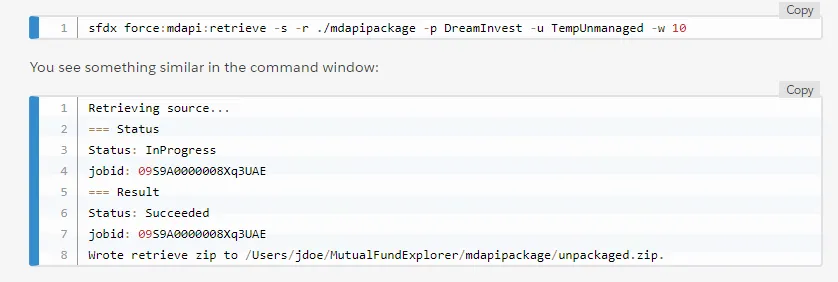
Extract the Package Source to Your Project
- sfdx force:mdapi:retrieve -s -r ./mdapipackage -p DreamInvest -u TempUnmanaged -w 10
Convert your Source (Metadata to Source Format) and Push it to a New Scratch Org
- sfdx force:mdapi:convert -r mdapipackage/
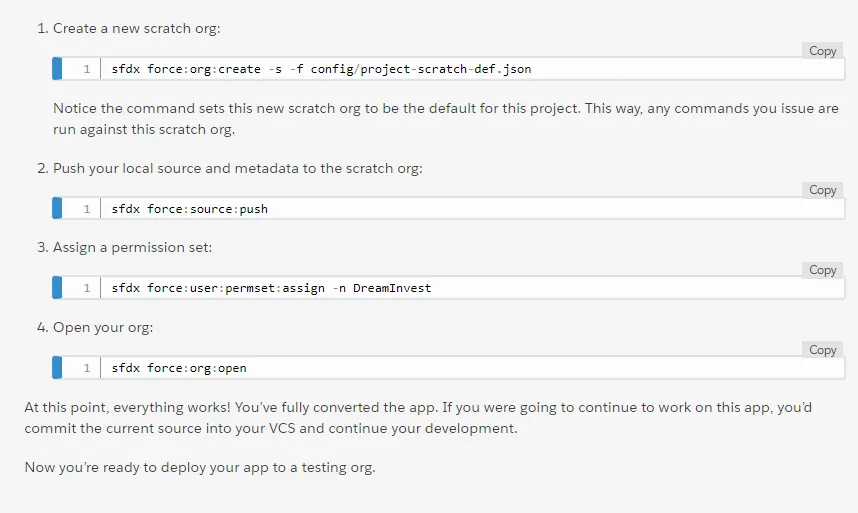
Verify Your Work
- Create a new scratch org
- Deploy your project
- Assign Permission
- Test it
See the Image Below to more information.
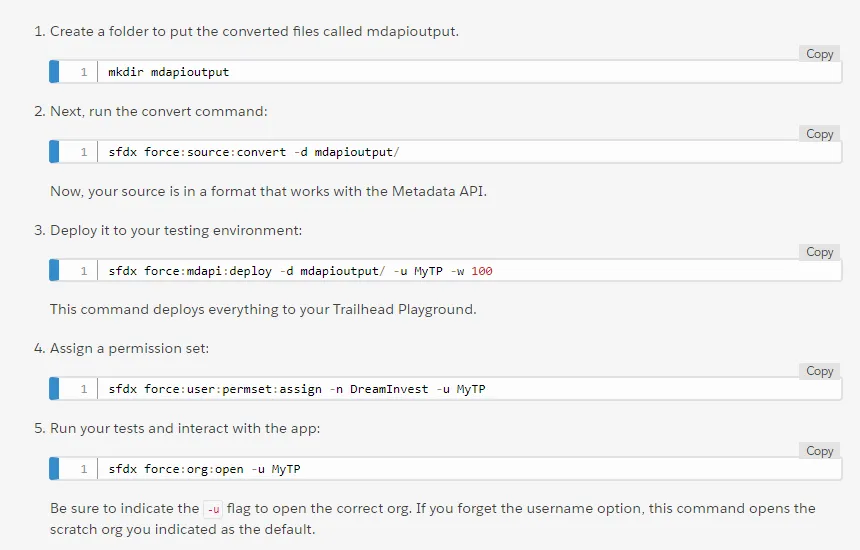
Convert Source to Metadata Format and Deploy
- sfdx force:source:convert -d mdapioutput/
- sfdx force:mdapi:deploy -d mdapioutput/ -u MyTP -w 100
- sfdx force:user:permset:assign -n DreamInvest -u MyTP
Create the Package
- First go to Dev Hub Org, from Setup enter Dev Hub in the Quick Find Box and select Dev Hub. Enabled to “Enable Unlocked Packages (GA) and Second-Generation Managed Packagaes (Beta)”.

- Create an unlocked package without a namespace, and supply the alias or username for your Dev Hub org if it’s not already set as the default
- sfdx force:package:create –name dreamhouse –description “My Package” –packagetype Unlocked –path force-app –nonamespace –targetdevhubusername DevHub
- –name: Itis the package name. This name is an alias you can use when running subsequent packaging commands.
- –path: It is the directory that contains the contents of the package.
- –packagetype: It indicates which kind of package you’re creating, in this case, unlocked.
- sfdx force:package:create –name dreamhouse –description “My Package” –packagetype Unlocked –path force-app –nonamespace –targetdevhubusername DevHub

- Open sfdx-project.json. Here you see packageId.
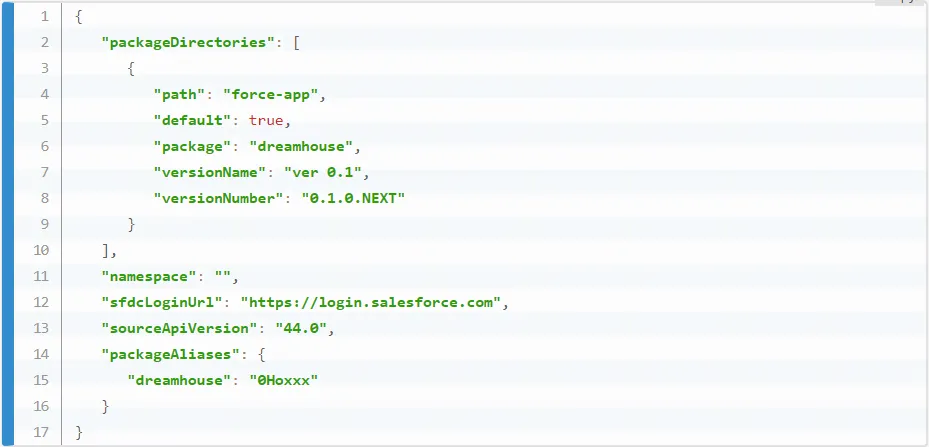
- Create a Scratch Org to Test Your Package Version
- sfdx force:org:create —definitionfile config/project-scratch-def.json \ —durationdays 30 —setalias MyScratchOrg -v DevHub
- Open the sfdx-project.json. Change the version Name to Version 1.0, and the versionNumber to 1.0.0.NEXT. and save the sfdx-project.json file.Create the Package Version and Install It in Your Scratch Org
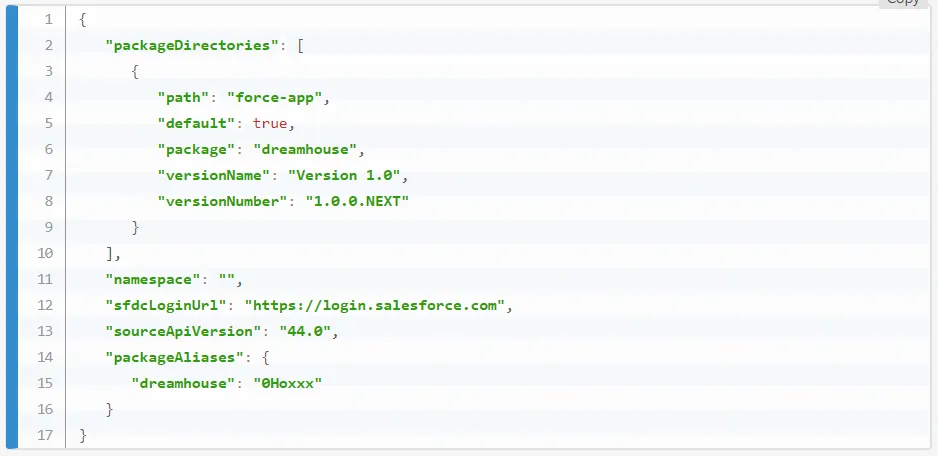
- Create the package version, which associates the metadata with the package.
- sfdx force:package:version:create -p dreamhouse -d force-app -k test1234 –wait 10 -v DevHub
- -p: It is the package alias that maps to the package ID.
- -d: It is the directory that contains the contents of the package.
- -k: It is the installation key that protects your package from being installed by unauthorized individuals.
- Now the packageAliases section in sfdx-project.json has a new entry.
- Use the package version alias to install the package version in the scratch org.
- sfdx force:package:install –wait 10 —publishwait 10 –package dreamhouse@1.0.0-1 -k test1234 -r -u MyScratchOrg
- After the package is installed, open the scratch org to view the package.
- From Setup, enter Installed Packages in the Quick Find Box and select Installed Packages.
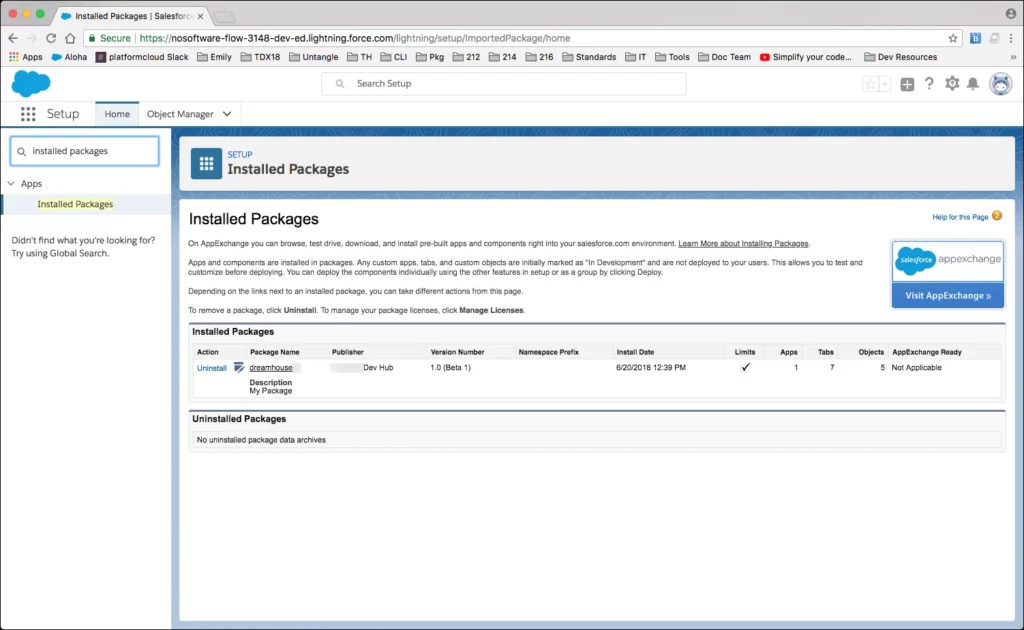
Release the Package Version
One feature we haven’t discussed yet is package status. Packages have beta status when you initially create them. When you know that a version is ready for the world, you can promote the package version to released.
- sfdx force:package:version:promote -p dreamhouse@1.0.0-1 -v DevHub
Install the Package Version In an Org
- Install the package version.
- sfdx force:package:install –wait 10 —publishwait 10 –package dreamhouse@1.0.0-1 -k test1234 -r -u MyTP
- Open your Org
- sfdx force:org:open -u MyTP
- From Setup, enter Installed Packages in the Quick Find Box and select Installed Packages.
Part 2 : What is Git and GitHub? How to use


